Showing posts with label recipe. Show all posts

Saturday, October 13, 2012

Apple Cider Doughnuts


This spring I was a tester for a gluten free recipe book, I'm even listed in the acknowledgments.  One of the items I made was struffoli which involved deep frying marble sized dough balls that are then piled up with a honey glaze drizzled over all of them.  Since I only did one test of the frying the oil was still "clean" and I stuck it in the freezer to make doughnuts some other time.

Now that we are moving it is time to clear out the freezer.  I decided, instead of throwing away this oil, I would make those doughnuts I had been planning for half the year.  I happened to purchase some apple cider and wanted a fun way to use it.  I did a Pinterest search for apple cider doughnuts and reviewed my previous gluten free doughnut pins.  Then I made a conglomerate recipe that I adapted to be gluten free.  Does that make it my own recipe?  I cooked them two ways.

Baked in my mini doughnut maker.

and fried in my defrosted oil.

Apple Cider Doughnuts
Ingredients
1 cup apple cider

1 cup rice flour
3/4 cups glutonous rice flour
1/2 cup potato starch
1/4 cup tapioca starch
1 tsp xanthan gum
1 tsp baking powder
1/2 tsp salt
1/2 tsp cinnamon
1/4 tsp nutmeg

6 Tbs melted butter
1/4 cup brown sugar
1 egg

1/4 cup greek yogurt
1 finely diced small apple

Directions
Reduce apple cider to a syrup, roughly a 1/4 cup and let cool.  Stir together the dry ingredients.  Whisk butter sugar and egg.  Dump egg mixture, yogurt and apple in the middle of the dry ingredients and slowly bring together.  Knead the dough a bit.

Using a small cookie scoop, divide dough.  I was able to make 33 balls.  Fry for 4 minutes in 150-170° oil or bake for 5 minutes in doughnut maker.  Either one, you are trying to get a dark golden colour.

I glazed mine with a 1 cup powdered sugar/3 Tbs apple cider mix.

While both versions were very yummy, we all agreed that the fried doughnut holes were the best.

Brownie Batter Ice Cream

For months after I received my ice cream maker I attempted to make Brownie Batter Ice Cream.  I would make a batch of brownie batter from the Brownie Lady/Sacrament Brownies recipe we have.  I would make different modifications, omitting the marshmallows, baking powder, eggs, replacing the eggs, etc.  I adjusted the ratio of batter to ice cream base (baking the leftovers for brownies that were sometimes used as a mix-in for a brownie batter/brownie chunk ice cream).  All iterations resulted in yummy, chocolaty ice cream, but not THE brownie batter ice cream I was envisioning.

In March I pinned a recipe for brownie batter ice cream that simply used brownie mix -  DRY and added cocoa powder.  This was a novel concept to me, and exciting.  Except, I had moved on to other delicious ice cream creations.  I will share my Al-Mound of Ice Cream Joy recipe.  With Lex's corn intolerance I had also been on the hunt for a new brownie recipe (we have found two).  Until now.  This week I made my own version of brownie batter ice cream.  It was spot on to my imaginings and I had to stop myself from eating eat out of the ice cream maker to save for tonight.  I knew I needed to write this down before I lost my page of scribbled starting points, adjustments, ratios, etc or simply forgot what I did with all those numbers, especially the parts that weren't written down.

Brownie Batter Ice Cream

Ingredients
Base
1 (14 oz) can of coconut milk (we use GoldenStar brand)
1/4 tsp salt
3 egg yolks
3 Tbs brown sugar
1 1/2 oz dark chocolate (we use bittersweet chips from Ghirardelli)
1 tsp vanilla

Dry Mix
2 1/2 Tbs rice flour
1 Tbs potato starch
1/2 Tbs tapioca starch
3 Tbs brown sugar
1 Tbs cocoa powder
1/8 tsp baking soda
1 tsp cocoa nibs

Directions
Heat coconut milk and salt in a double boiler.  Put chocolate and vanilla in a separate bowl.  In another bowl, whisk together egg yolks and brown sugar.  Temper egg mixture with heated coconut milk (150-160°) then add to the double boiler.  As mixture reaches 160°, stir for 2 minutes.  Pour thru strainer into bowl with the chocolate and vanilla.  Stir to melt chocolate and combine.  Allow mixture to cool in refrigerator overnight.

Grind cocoa nibs to powder.  Mix together all dry ingredients with whisk.  Churn ice cream mixture and dry mix in the ice cream maker.  Try not to eat it all as you transfer it to a container for the freezer.

Friday, March 30, 2012

Jensen Family Gluten Free Waffles

We have had a number of requests to share our waffle recipe.  Seeing that we make them every week, it surprised me that they weren't already up.  I think these are the BEST waffles, even compared to the gluten ones that I can still order and eat when we are out.

The wet ingredients
Beat together flax, water, egg yolks, milk, and pumpkin.

The dry ingredients

Add flours, baking powder, salt and xanthan gum. Mix to become a batter.

Meringue!
In a separate bowl, beat egg whites until stiff. Add sugar, and beat until the whites form soft peaks. Fold into batter.

The workstation set up.
This is my system to bake the waffles.  When both ready lights are on, I spray the plates and plop an almost 1/4 cup of batter into each square.  There is a lot left in/on the measuring cup (hence the "almost 1/4 cup") so I have a plate to catch all the extra batter.  Then I fill the second (black) iron.  While they are baking I wash out the dishes.  When the first (white iron's) ready light comes on again, I move the finished waffles to the cooling rack, spray and fill, and then remove the second iron's waffles.  Stacking the cooled waffles to make room for the hot ones.  Repeating again, and again and . . .

I regularly scrape the sides of the bowl down and scrape the batter from the plate back into the bowl.  Then I give the batter a little "fold" to ensure that the heavier ingredients don't settle at the bottom.  If the children are not "helping" I am able to make a weeks worth of sandwiches in an hour, start to finish.
My favourite waffle iron
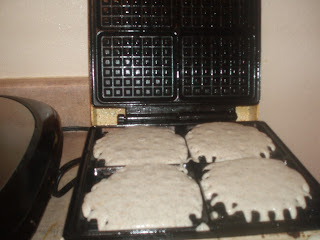
We have had this (white) waffle iron for forever, possibly a wedding gift in 1998.  Before going gluten free we never used it, but it managed to stay with us thru 3 moves.  We always thought it was easier to make french toast or pancakes.  When 18 month old Alayna needed to begin a gluten free diet, and I could not master gluten free bread, we began to make waffles for her sandwiches.

This waffle iron has been used, roughly, once a week for 7 years!  It is irreplaceable.  See, it is a true "regular" waffle iron.  Rectangular waffles with small, shallow pockets.  All irons on the market today are "Belgian" waffle irons.  Even the non-round ones have these wide, deep pockets.  While our other/newer waffle iron works, to use the same amount of batter I have to spread it around to fill out the square.  Then, it doesn't rise as well and you don't get the deep pocket anyway.

This is 8 days of sandwiches for 3 children (aka 48 waffles)
Can you see the difference in the new vs old irons' waffles?  The front row has older on the left, newer on the right.  Because I like the old iron's waffles better, when I get to the end I will make the last batch (sometimes only 1 or 2 waffles worth) on it.  That's why there is an old iron waffle on the right side.

Jensen Family Gluten Free Waffles
adapted from Eating Gluten Free

2 Tbs Ground Flax
1/2 Cup Water
3 Egg Yolks
2 Cups Milk *
2 Cups Water *
1 Cup Pumpkin Puree **

1 Cup Sorghum Flour***
1 Cup Buckwheat Flour
1 Cup Brown Rice Flour
1 Cup Tapioca Starch ****
2 Tbs Baking Powder
1 tsp Salt
1/2 tsp Xanthun Gum, rounded

6 Egg Whites
1/4 Cup Sugar*****

Beat together flax, water, egg yolks, milk, and pumpkin. Add flours, baking powder, salt and xanthan gum. Mix to become a batter.

In a separate bowl, beat egg whites until stiff. Slowly add sugar, until the whites form soft peaks. Fold into batter.

Bake on a hot waffle iron.

Keep waffles in a warm oven (with the door cracked open) until you are ready to eat. Any leftover waffles may be placed in Ziploc bags and frozen. They may then be reheated in the toaster, or made into sandwiches in the morning, to defrost in time for lunch.

* Really it's just 4 cups of liquid.  If I have leftover coconut milk I will add that, if I am at the end of the milk jug, I will just finish it.  I do try to have at least 2 cups be something other than water though.

** You can also use applesauce.  If I want to get fancy, for eating waffles not sandwich waffles, I will add pumpkin spice with the pumpkin: 2 tsp cinnamon, 1 tsp ground ginger, 1/2 tsp ground clove or allspice.

*** Our supplier of Sorghum flour stopped stocking it, we now use white rice flour, but preferred the sorghum.

**** You can substitute another starch, perhaps potato or corn.

***** When we are doing the "fancy" waffles, we will sometimes use brown sugar in place of the regular and then add 1 tsp of vanilla extract.

And those 3 extra egg yolks?  With a can of coconut milk and a 1/3 cup of sugar I make an ice cream base.

Wednesday, June 22, 2011

Peanut Butter Cup

A couple weeks ago we were in the freezer aisle buying spinach, Alayna was scoping out the ice creams on the other side.  She wanted the Peanut Butter Cup.  Except we were making "Purple Cow" flavour that weekend.  Instead, we bought some peanut butter cups to store in the freezer for the next week's ice cream.  It was very worth the wait.


Peanut Butter Cup Ice-Cream
1 Cup Peanut Butter (we used the creamy Jif Natural)
2/3 Cup sugar
1/2 tsp salt
2-14 oz cans Coconut Milk
20 mini peanut butter cups, most chopped into sixths but save a few to only chop into quarters)

Beat peanut butter, sugar and salt till smooth.
Stir in coconut milk.  Cool mix in fridge for an hour.
Churn mixture in the maker.  Transfer to a container, stirring in peanut butter cups.  Freeze overnight.

As if that wasn't yummy enough, Paul made his very own "Magic Shell" type of chocolate topping.


Crispy, melt-in-your-mouth chocolate topping.
1/4 Cup Coconut Oil
1/4 Powdered Sugar
2 Tbs Cocoa Powder

Microwave oil quickly, like 15 seconds, to melt it.  Stir in sugar and cocoa.  Drizzle on top of frozen ice cream.

Sunday, May 29, 2011

Ice Cream!

For Christmas this past year, Paul bought me this Cuisinart Ice Cream Maker!  Even better, he got it on sale for half the price, including the shipping.

Since December we have been making ice cream almost every week.  Our first try was vanilla, custard-style ice cream with bits of our gluten free brownies for the mix-in using the recipe book included with the machine.  Since then we have branched out and made our own recipes.  We have had many successes, some repeats, a few that need fine tuning and one failure.  What we haven't done is written them down.  That needs to change.  So, I will start with our most recent success.

Orange Coconut Ice Cream

Ingredients

  • 10 egg yolks
  • 1/2 cup brown sugar
  • 1 tsp vanilla

  • 6 oz orange juice concentrate
Directions
  • While stirring, heat first 4 ingredients in a double boiler to 175°
  • Whisk together egg yolks and second 1/2 cup of brown sugar
  • Gradually temper egg yolk mixture with 1 1/2 cups of milk mixture
  • Incorporate the tempered egg mixture into the remaining milk in the double boiler
  • Stir and heat for 3 minutes

  • Place vanilla in a separate bowl and pour in the milk/egg mixture.  Stir, and place into the fridge overnight.

  • Freeze ice cream mixture and orange juice concentrate in the maker.  Transfer to a container and freeze overnight.

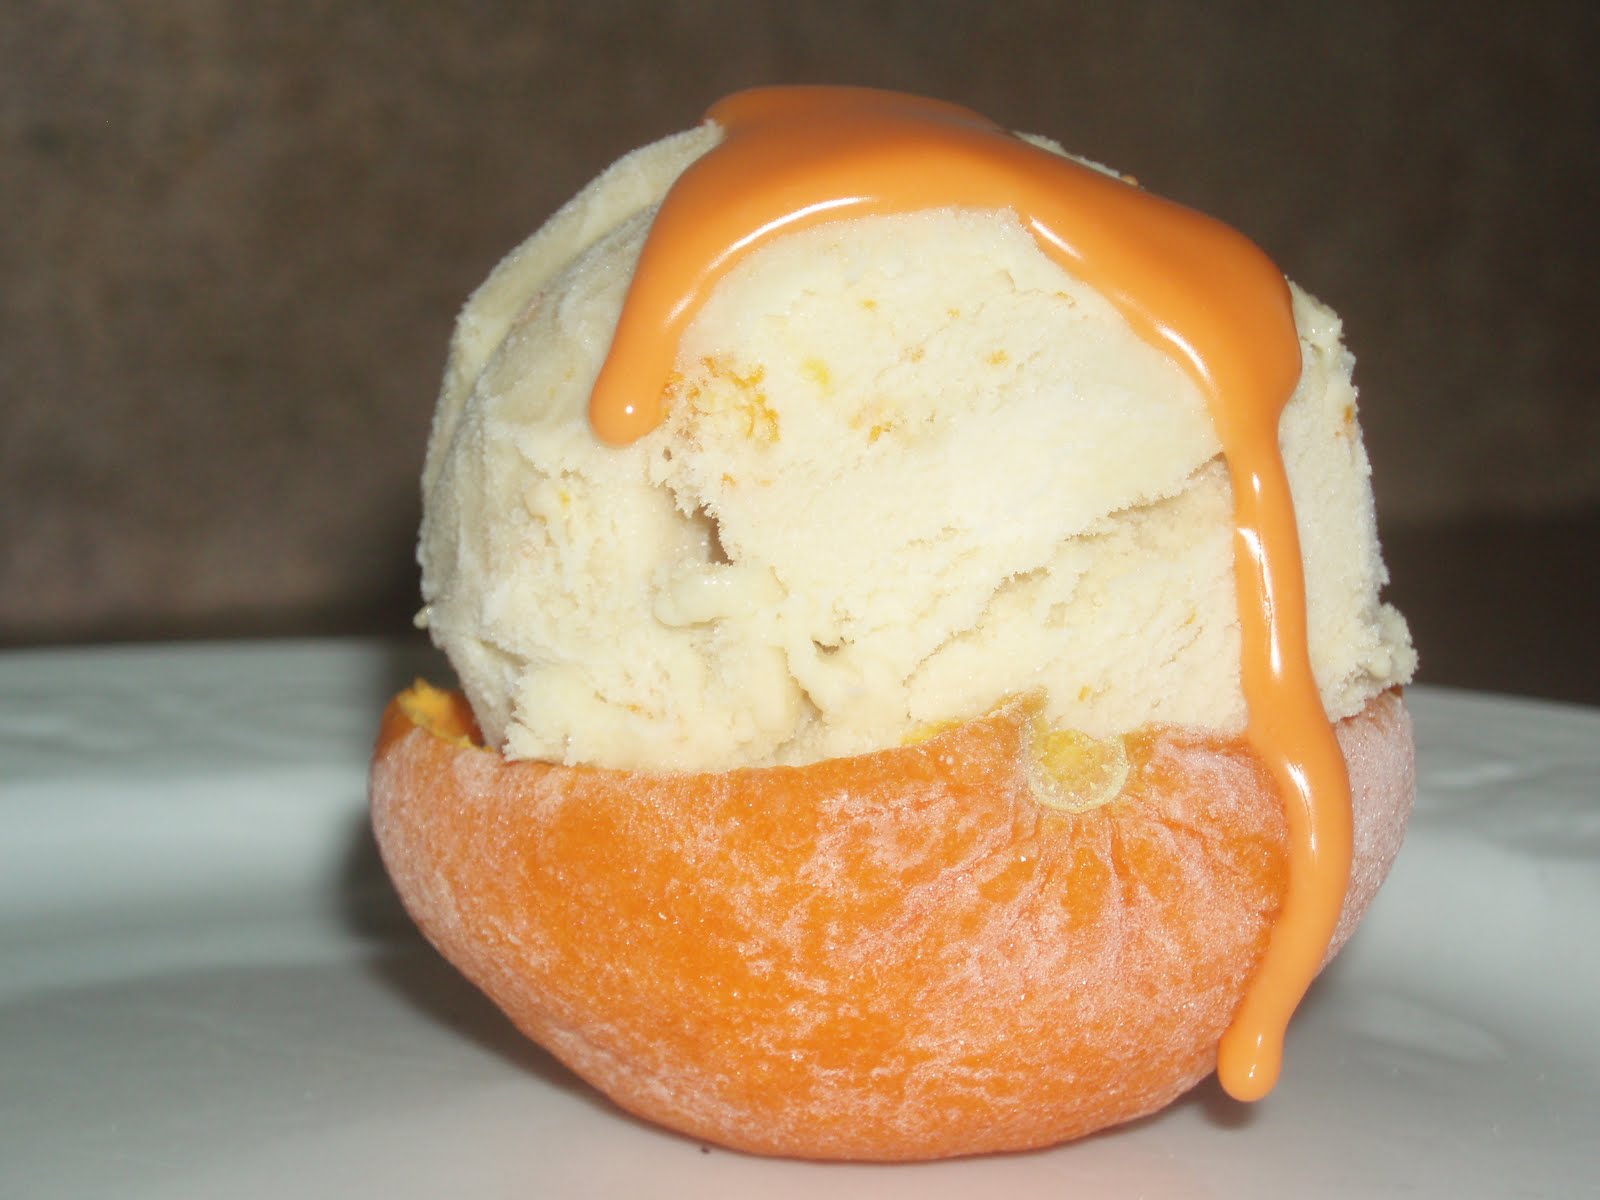
The kids liked theirs served in some cutie peels we had saved in the freezer.  Paul even found some Orange Creme Magic Shell for our citrus treat.

Monday, March 28, 2011

Aloo Gobi

Stacy attended an evening cooking class with a friend and learned how to cook a few Indian dishes.  Her first attempt at home was the dish Aloo Gobi, made famous here in America from it's reference in the movie, Bend it Like Beckham. The dish is described as a traditional north Indian delicacy which is a dry dish made from Potatoes and Cauliflower and Indian spices. We just call it awesome. It's normally considered a vegetarian dish, but it tastes incredible when served on top of chicken!

Alayna and Cavell turned their noses up at the dish, but Lex really enjoyed it.  Stacy and I were both surprised because this dish has a pretty strong flavor, but he kept diving for the spoon and sucking on the food to get all the flavor out before swallowing.  At least one of our kids can appreciate a good chunk of cauliflower.

Here's the recipe Stacy received from the Executive Chef at Gourmage who taught the cooking class.  The changes we have made are in parenthesis.


Aloo Gobi

Ingredients:

1/2 cup vegetable oil (We use just enough olive oil to saute the onions.)
1 Medium onion, medium diced
1 Bunch fresh Cilantro, separate leaves from stalks and chop the stalks
1 Small Green chili, minced
1 Large head Cauliflower cut into larger bite sized pieces (we've been using frozen)
3 White potatoes peeled and cut into bite sized pieces (we use sweet potatoes)
1 Can whole peeled tomatoes, grated (we use 1 can diced)
Thumb length fresh ginger peeled and grated (1 1/2 tsp of or frozen, grated ginger)
3 Cloves garlic, grated (minced)
1 Tblsp Cumin seeds
2 tsp Tumeric
2 tsp Salt
2 tsp Garam Masala (recipe follows)

Directions:

Heat oil in a large pan or Wok over medium heat.  Add onion and cumin.  Cook till onion is creamy golden.  Add chopped cilantro stalks, tumeric, salt, and minced chili.  Stir in tomatoes, ginger, and garlic.  Mix well to combine and add potatoes and cauliflower.  Completely coat the potatoes and cauliflower in the sauce and add a few spoonfuls of water (to keep vegetables from sticking).  Cover, reduce heat and simmer for about 20 minutes (or until potatoes are tender).  Gently stir in Garam Masala and remove from heat.  Sprinkle chopped cilantro leaves on top and cover until ready to serve.


Garam Masala

1 Tblsp ground Cumin
11/2 tsp ground Coriander
11/2 tsp ground Cardamom
11/2 tsp ground Black pepper
1      tsp Cinnamon
1/2   tsp ground Cloves
1/2   tsp ground Nutmeg

Thursday, November 25, 2010

Thanksgiving Dessert

I know, most people have pie, pie and more pie for dessert on Thanksgiving.  We are the Jensen Family.  There are only four of us eating.  We can't eat a lot of dessert, so we pick one dessert to have after our Thanksgiving Feast. The Head Baker of the Family is not a big pie fan.  We can't even buy a ready made pie to satisfy the big pie fan of the family.  Instead, we have adhered to an Onines Family Tradition and indulged in Pumpkin Cheesecake every year.  I now admit to adapting the recipe  many years ago, and not just to be gluten free.  But wait!  This year, The Head Baker of the Family cannot consume such large amounts of dairy (thanks to the beloved, new addition to the family).  Why would I spend the time and energy making a delicious treat that I cannot enjoy?

During Family Home Evening a few weeks ago, the whole family helped to make the menu for our Thanksgiving Feast.  Alayna requested carrot cupcakes.  The Head Baker of the Family is not a big fan of carrot cake either.  We have a recipe; I've made it; the family has enjoyed it.  I didn't want that as the finale to our Thanksgiving meal.  Luckily for Alayna, I had just read about a Brazilian carrot cake the day before.  She just needed to accept that it would not be in cupcake form.  When she saw the Bundt pan we would be using instead, she stopped pouting.


Bolo de cenoura
(from Glutenfearless)

Ingredients
Cake
1-1/3 C  Rice Flour
6 Tbs + 2 tsp Potato Starch
3 Tbs + 1 tsp Tapioca Starch
1Tbs + 1 tsp Baking Powder
1 tsp salt
1½ tsp Xanthan Gum
½ t. Cinnamon (optional)

3 C Carrots, grated (rougly 4 medium or 8 slender carrots)
3 Eggs
1 3/4 C Sugar
½ C Oil
1 tsp Vanilla

Glaze
2T cocoa powder
2T butter
5T milk
8T sugar

Directions
  • Preheat oven to 350° grease and flour a 10" Bundt pan
  • In a bowl combine flours, baking powder, salt, xanthan gum, and cinnamon.
  • In your blender purée remaining 5 ingredients until smooth.
  • Pour the blender concoction into the dry ingredients and stir together until everything is well mixed and very orange.
  • Pour cake batter into prepared Bundt pan and bake at 350 degrees for about 40-50 minutes.
  • While still warm, invert the cake onto the serving platter.
  • While stirring, gradually heat glaze ingredients in a small saucepan.  When the icing bubbles, keep stirring for another minute.  Pour hot glaze over the cake while the cake is warm.


Notes/Verdict  Boy, did we all enjoy this cake!  Moist, fluffy, sweet . . . and the glaze, Wow!  Not only is it yummy, it is fun to make . . . in the blender.  It went from layers of ingredients to this bright orange slurry.  It became a lovely orange batter when mixed into the flours.

Thanksgiving Breakfast

Pumpkin Cinnamon Rolls
(adapted from cinnamon rolls in  The Gluten Free Kitchen by Roben Ryberg found here)
Ingredients
Rolls
2 Tbs Butter
1/4 Cup Sugar
2/3 Cup Milk, warmed (~105*)
1 Tbs Yeast
1 Egg
1/4 C Pumpkin Puree
1/2 C Potato Starch
1 C Corn Starch
1/4 Tsp Baking Soda
2 1/2 Tsps Xantham Gum
2 Tsps Baking Powder
1/2 Tsp Salt
1 Tsp Vanilla Flavoring

Filling
1/2 C sugar
1/3 C brown sugar
1 tsp ground cinnamon
1/2 tsp ground ginger
1/4 tsp ground allspice or cloves
1/4 tsp ground nutmeg
4 Tbs chilled butter, cut into small pieces
Mix dry, cut in butter to form crumbs and spread over rolled out dough

Glaze
½ C powdered sugar
1 Tbs Pumpkin puree

Directions
Add yeast to milk. Whisk well to fully dissolve.  Cream butter and sugar.  Add milk/yeast to sugar mixture. Add remaining ingredients. Mix very well, being sure to remove all lumps. Dough will be quite soft

Roll dough out between plastic wrap.  Cover with filling, leaving a filling-free edge for sugar to spill over onto.  Roll into a log and trim ends.  Slice (with thread) into 8 or 9 pieces (roughly 1½ inches).  Place in greased pie pan.

You can bake them now, or cover with plastic wrap and store in the fridge overnight.

Remove rolls from fridge and bring to room temperature.  Preheat oven to 375°.  Remove plastic wrap and cover with aluminum foil.  Bake for 20 minutes.  Uncover and bake an additional 10 minutes and make glaze.  Remove from oven. top with glaze and enjoy!

Notes/Verdict
I took them out of the fridge while the oven preheated this morning.  I think they should be room temp before putting in the oven.  I didn't get enough glaze, so I added another 1/4 C powdered sugar, the rest of my pumpkin puree (maybe 2 tsp), and a splash (maybe a T) of almond milk.  Paul thinks we need to adjust even more to increase the pumpkin (hard) and spice (easy) flavours.  We all LOVED these!  They are all gone.

Monday, November 08, 2010

Chocolate Waffle Pillows

This treat was the most anticipated recipe from the Mrs Fields book.  I think that is because my kids KNOW waffles.  We make waffles almost every week.  We use our waffles as sandwich bread almost every day.  Cavell calls them "Goggles."  By 'them' I am referring to the waffles AND the sandwiches.  I have recently convinced him that the meal is called lunch, NOT waffles.  Just yesterday while playing with Alayna, he named the puppet he was characterizing, Goggles . . . I mean Waffles.  The kids were extremely excited for Chocolate Waffle Pillows.


Chocolate Waffle Pillows
(adapted from Mrs. Fields Best Ever Cookie Book!)
yield 2 dozen

Ingredients
2/3 cup Rice Flour
3 Tbls Potato Starch
2 Tbls Tapioca Starch
1/2 tsp Xanthum Gum
1/2 tsp Baking Powder
1/2 cup Cocoa Powder
1/2 tsp salt (because I use unsalted butter)
1 stick (1/2 cup) butter, softened
1 cup Sugar
2-1/2 Eggs*
1 tsp Vanilla

Directions
  • Combine flours, xanthum gum, baking powder, cocoa and salt.  Set aside.
  • Cream butter and sugar.  Beat in eggs and vanilla.  Slowly add flour mixture until just combined.
  • Drop by rounded Tablespoons onto each section of a hot, greased waffle iron.  Cook approximately 1 minute (or more) and carefully transfer to a cooling rack.
  • Serve with any yummy topping(s), like powdered sugar, cocoa powder, raspberries, or whipped cream.  We used chocolate syrup.

Notes/Verdict
Because I halved the recipe I needed 2-1/2 eggs.  I beat 5 eggs together, weighed them and used half for the waffles and half for an omelet in the morning.  I don't think they need as much xanthum gum as I used; they might even work with none.  I liked these better off of our small squared waffle iron than from our larger/deeper, not quite Belgian, waffle iron.

These were easy to make.  I feel bad that it took as long as it did to get around to making them.  The kids LOVED them.  Paul did not like them.  I thought they were fine.  I would describe them as a brownie that is almost on the fudge-y side, but isn't cake-y  This might be because they were thin.  They were a bit better as a warm dessert than as "cookies" in the cookie jar.  If the kids think to ask for these again I would be willing make them, but I would suggest other treats instead.  I might try "baking" a few other types of cookies this way, just to experiment.

Saturday, October 30, 2010

We'll Give AB Another Try.

Do you remember when we gave Alton Brown's gluten free, chocolate chip cookies a try?  We weren't impressed enough to try them again.  But last week, I caught the middle of a Good Eats episode using leftover oatmeal (Oat Cuisine II). I have oatmeal for breakfast every morning.  Dark chocolate oatmeal with strawberries, blueberries and almond milk.  Yumm.  The things he was making sounded good, except he was still adding flour.  I was ready to turn it off until he said, "Hey kids, riddle me this, what the heck is wheat doing in an oatmeal cookie?"  (the segment starts at 2:26-6:36) While deciding which treat to make today, Paul requested we try these cookies.

Oatiest Oatmeal Cookies
(Recipe courtesy of Alton Brown)
about 3 dozen cookies

Ingredients
  • 16 ounces old fashioned rolled oats
  • 1 teaspoon baking powder
  • 1 teaspoon ground cinnamon
  • Pinch kosher salt
  • 10 ounces unsalted butter, at room temperature
  • 6 ounces dark brown sugar
  • 3 1/2 ounces granulated sugar
  • 1 large egg
  • 1 teaspoon vanilla extract
  • 4 ounces raisins, optional

Directions
Heat the oven to 375 degrees F.

Spread the oats into a single layer on a half sheet pan. Bake until lightly toasted, about 20 minutes. Cool the oats in the pan for 2 to 3 minutes.

Grind 8 ounces of the toasted oats in a food processor until the consistency of whole-wheat flour, about 3 minutes. Add the baking powder, cinnamon, and salt to the food processor and pulse 2 to 3 times to combine. Set aside.

Combine the butter and sugars in the bowl of a stand mixer, and mix on medium speed using the paddle attachment until light in color about 3 minutes. Stop once to scrape down the sides of the bowl. Reduce mixer speed to the lowest speed and add the egg and vanilla extract. Mix to combine. Slowly add the flour mixture until just combined. Stop once to scrape down the sides of the bowl. Add the remaining toasted oats and the raisins. Stir to combine.

Scoop the dough with a 1 1/2-ounce disher or server onto parchment-lined half sheet pans, leaving 2 inches between each mound. Bake until the cookies begin to brown around the edges, about 12 to 14 minutes. Rotate the pan halfway through the cooking time. Cool the cookies on the pans for 2 minutes, then remove them to a cooling rack to cool completely.


Verdict/Notes
We really like these cookies!  Next time, we will toast more oats.  The leftovers make great oatmeal, and then we will still have the full weight of oats after toasting (they lost a surprising amount of water weight!).  We only had light brown sugar; I will try adding molasses to substitute for dark brown sugar.  Instead of my tiny pinch of salt I used 1/4 tsp salt.  We love the cinnamon flavour, but want to make it stronger.  Next time I will double the cinnamon, and maybe add some nutmeg.  I forgot to plump/hydrate the raisins.  I will remember next time, and increase the amount we add.  We made one dozen using two scoops each of our #50 disher, baked for 12 minutes.  We also made 1-1/2 dozen using single scoops baked for 10 minutes.  It is not even the end of the day, and these cookies are more than halfway gone!

Tuesday, October 12, 2010

Cookies You Can Make With Your Eyes Closed . . .

. . . if you are 3 and have an adult to do the actual baking.  This recipe is also from Mrs. Fields' book with only a minor adaptation for gluten free.


Lacy Oatmeal Cookies
yield 8 dozen (according to the book, 5½ dozen for us)

Ingredients:
1 cup quick oats
1/8 cup rice flour
1/8 cup tapioca starch
1/2 tsp salt
1-1/2 tsp baking powder

1 cup sugar
1/2 cup (1 stick) salted butter, softened
1 egg
1 tsp vanilla

Directions:
Preheat oven to 325*
Combine oats, flours, salt and baking powder and set aside.
Beat sugar and butter to a grainy paste.  Add egg and vanilla, beating until smooth.
Add flour mixture and blend just to combine.
Drop dough by teaspoons onto lined cookie sheets, 2-1/2 inches apart.
Bake 9-12 minutes, until edges begin to turn golden.  Cool and remove.


Ours do not look like the picture in the book.  Probably because we used old fashioned oats.  Possibly because I looked for more of a "creamed" look before adding the flour mixture.  I don't know the why of not creaming the sugar and butter and then adding the egg and vanilla, do you?  The book's cookies looked lacy.  They actually said to "peel off" the cookies from the baking sheet. Ours had a little lace-ness to them, but also had a little poof.  Either way they tasted really good.

Saturday, October 09, 2010

Pumpkin Chocolate Chip Cookies

I remember enjoying my first pumpkin chocolate chip cookie in the English Department at BYU. They were from the Provo Bakery (190 E 100 N) and I was told they were the BEST version I would ever try. I believed it. Due to different circumstances in life (that whole "gluten free family" thing being one) I haven't had a pumpkin chocolate chip cookie since I left the department. I no longer know what about those cookies made them that fabulous in my memory, but I have thought of them often, with longing.

I was recently informed that this recipe was the one to try for pumpkin chocolate chip cookies. It happens to be the recipe of my running friend, Heidi. It shouldn't surprise anyone, I have now made a gluten free version.

Pumpkin Chocolate Chip Cookies
(adapted from Food for Thought: Where Flours Bloom)
yield 3½ - 4 doz.

Ingredients:
3/4 cup butter, softened
1 cup packed brown sugar
1/2 cup sugar

1 cup pumpkin purée
1 egg1/2 tsp vanilla

2/3 cup rice flour
2/3 cup tapioca starch
2/3 cup corn starch
1/2 cup almond flour
1 tsp xanthum gum
1 tsp baking soda
1/2 tsp salt
1 tsp cinnamon
½ tsp each cloves, nutmeg, ginger

1 c. mini semisweet morsels

Directions:
Cream butter and sugars together. Beat in egg, vanilla and pumpkin. Combine flours, xanthum gum, baking soda, salt and spices. Add flour mixture and chocolate chips to the creamed mixture and mix to combine. Refrigerate dough for a couple of hours.

Preheat oven to 350 degrees. Scoop cookie dough onto an ungreased baking sheet. With wet fingers, slightly flatten and smooth the tops. Bake for 10-12 minutes, or until just set.

We all thought these were very yummy. They reminded us of little bites of a delicious cake. Are they as good as the cookies I remember from school? I don't know, but I do know that I had to lock up the cookies I could save from my family's greedy maws before all 4 dozen were gone in a single afternoon.

Friday, October 08, 2010

Brown Buttercrunch Cookies

I checked out Mrs. Fields Best Ever Cookie Book! from the library.


Alayna and I went thru and marked all of the cookies and treats we wanted to try (that weren't just a chocolate chip cookie base with alternate mix-ins). Then I determined which had ingredients most likely to be on hand. From those, I had to guess which ones might be adaptable for Gluten Free flour substitutions. 200 recipes were ultimately narrowed down to 5 MUST MAKE treats before we need to return the book. Brown Buttercrunch Cookies was the first.

Brown Buttercrunch Cookies
yield: 2-1/2 dozen cookies

Ingredients
Cookies:
1 stick (1/2 cup) salted butter, softened
1/2 cup corn syrup
2/3 cup (packed) dark brown sugar*
1 cup old-fashioned oats (not quick or instant)
3/4 cup all-purpose flour**
1 teaspoon vanilla extract

Chocolate Glaze:
1/4 cup heavy cream
6 ounces semi-sweet chocolate chips (about 1 cup)
2 teaspoons light corn syrup
  • Preheat oven to 350 degrees F. Line cookie sheet with parchment paper.
  • Melt butter, corn syrup, and brown sugar over moderate heat, stirring constantly until sugar dissolves. Increase heat to high. When mixture boils, remove from heat and stir in oats, flour, and vanilla.
  • Drop by half teaspoons 3 inches apart onto lined cookie sheets. Bake for 8 minutes or until mixture spreads, bubbles and begins to brown. Let cookies cool for 1-2 minutes before rolling.
  • Roll around a wooden spoon handle, creating a tube. If cookies become too brittle, return to oven for 30 sec. to soften, then try again. Cool rolled cookies completely.
Chocolate Glaze:
Heat cream in microwave safe bowl until scalded. Remove from heat and stir in chocolate chips and corn syrup. Cover and let stand for 15 minutes for chocolate to melt. Mix until smooth.
When cookies are cool, dip half of each cookie into chocolate glaze. Refrigerate for 15 minutes to set.

*I only had light brown sugar, so added 2 tsp of molasses to the corn syrup
**I used 1/4 cup each of Rice Flour, Potato Starch and Tapioca Starch

Notes
I figured out to drop ALL of my 1/2 tsps of cookies onto one long piece of waxed paper. Then, when it was time for a new tray, I only had to transfer 6 of the blobs with my silicone spatula. Otherwise, my mixture was cooling off between batches making them hard to portion.

The recipe is not kidding about dropping by 1/2 tsps 3 inches apart! These puppies spread. I use half sheet pans for my baking (with a liner that I love) and only placed 6 cookies each time. That worked well, because there is not much time for rolling. I started about 25 seconds after removing from the oven and sliding the liner onto a cooling rack. While it was still too hot to want to touch, but not so hot that the cookie was too melt-y to roll. I had to roll fast, or the last one was too brittle and I didn't want to have to put it back in the oven because the next batch was already in. I only needed to bake them for 5 minutes.

Because you are only using 1/2 tsp per cookie, this makes well over 2-1/2 dozen cookies! Or maybe they are referring to the number of cookies that will actually turn out right. A fair number of mine broke,

the roll became flat,
or weren't quite a roll because of flat parts cracking and poking up.
I did get some good rolls.


Verdict
Meh. Not bad exactly, but not at all worth the effort and overheated fingertips.

I think there is WAY to much butter in these. Making them my hands became greasy and there were actually bubbles in the layer of butter left on my liner after each batch that I had to wipe off. After I finished, I double checked that it said 1/2 cup of butter and not 1/2 a stick. It really wanted the whole stick! Even the cooled cookies left my fingers greasy.

These aren't good cookies for nibbling either. Because they are so brittle, one bite seems to make the whole thing shatter. Cavell decided he needed to eat his over the garbage can.

Edit to add:
I am more willing to call this a candy, like a brittle, rather than a cookie.  And, if I am in the mood for such a candy, I would rather make microwave peanut brittle.  I'll save that recipe for a later post.  If I want a light, sweet oat cookie, I will be making the Lacy Oatmeal Cookies.

Sunday, October 03, 2010

Artisan Bread

A while ago (January), Paul sent me a link to a recipe for a simple, free-form gluten free bread. The exciting part for me was that I had heard about the book (or maybe it was their first book) thru regular flour users that were loving the whole rustic bread idea and having great results using this method.
When a different GF blogger recently posted her great results and love for this bread I decided I would give it a go. I even had everything on hand.
Gluten-Free Crusty Boule
Makes enough dough for at least four 1-pound loaves

2 cups Brown Rice Flour
1 1/2 cups Sorghum Flour
3 cups Tapioca Flour (also called tapioca starch)
2 tablespoons yeast (can be reduced but you will have to increase the rise time)
1 tablespoon kosher salt (increase or decrease to taste)
2 tablespoons Xanthan Gum
2 2/3 cups lukewarm water
4 large eggs, whisked together
1/3 cup neutral-flavored oil or olive oil
2 tablespoons honey or sugar

Whisk together the flours, yeast, salt and xanthan gum.
Combine the oil, sugar and water, set aside.
Dump the eggs into the dry ingredients and then stir while you gradually pour and mix in the oil and water.
Stir until the dough is nice and smooth. Cover and rest on the counter for about 2 hours. Place the dough in the refrigerator and store for up to 7 days.

On baking day remove 1-pound (grapefruit-size) piece of dough. Use wet hands to smooth out the surface of the dough. Cover loosely with plastic wrap and allow to rest on the counter for about 90 minutes. 30 minutes before baking time preheat the oven with a 5 1/2 quart Dutch Oven in it to 500 degrees.

The dough will not have grown much while resting, but it will seem a little bit puffier. Use a serrated knife to cut slashes in the dough. Lower the parchment and bread into the pot. Return to the oven and bake for 20 minutes. Remove the lid, turn the heat down to 450 and bake for an additional 15 minutes. Allow the bread to cool completely before eating.
Because they said it makes 4 loaves, I halved the recipe. It's a lot of flours and xanthum gum to risk wasting on an experiment. When it was time to divide, I even weighed my dough balls. 2 dough balls, 1-pound each.

Look how well that turned out.
For reference, that is a sandwich bag the "loaf" is sitting on.
Can you guess how the inside turned out? That's right. Dense and heavy, and not in a good, hearty bread sort of way.
This is ALL the slices I got from a loaf.

I don't know why I keep following, to the letter, recipes that have me mix my yeast in with the dry ingredients. It ALWAYS fails. I don't think the beginning dough ball rose at all. But then, for the instructions to reassure me that I shouldn't expect the individual loaf dough balls to grow during their rest wasn't encouraging either. I know my yeast is still good. I am strict about checking the temperature of my water so I don't kill the yeast. IF I was going to try this again, I would let the yeast grow in the sugar water mixture instead. But, I don't think I'm going to try again. The flavour wasn't that impressive when I already have a bread recipe that has been successful every time. Although this does use less flours, yeast and xanthum gum per loaf - which could be worthwhile if they would rise more, you know, to the size of a regular loaf.

Thursday, September 09, 2010

Original Baker's German's Sweet Chocolate Cake

We made German Chocolate cake, gluten free. It was delicious!

We used the recipe from the Baker's German's Sweet Chocolate bar, but subbed in our gluten free flours*.

We did "cheat" and used Betty Crocker's Coconut Pecan frosting.

Gluten Free flour substitution
*2 cups flour =
1 1/4 c Rice Flour
6 Tbs + 2 tsp Potato Starch
3 Tbs + 1 tsp Tapioca Starch
2 tsp Xanthum Gum

Original Baker's German's Sweet Chocolate Cake
1 pkg. (4 oz.) BAKER'S GERMAN'S Sweet Chocolate
1/2 cup  Water
4 Eggs, separated
***2 cups  Flour
1 tsp. Baking soda
1/4 tsp.  Salt
1 cup Butter, softened
2 cups  Sugar
1 tsp. Vanilla
1 cup  Buttermilk
HEAT oven to 350°F.
COVER bottoms of 3 (9-inch) round pans with waxed paper; spray sides with cooking spray. Microwave chocolate and water in large microwaveable bowl on HIGH 1-1/2 to 2 min. or until chocolate is almost melted, stirring after 1 min. Stir until chocolate is completely melted.
BEAT egg whites in small bowl with mixer on high speed until stiff peaks form; set aside. Mix flour, baking soda and salt. Beat butter and sugar in large bowl with mixer until light and fluffy. Add egg yolks, 1 at a time, beating well after each. Blend in melted chocolate and vanilla. Add flour mixture alternately with buttermilk, beating until well blended after each addition.
ADD egg whites; stir gently until well blended. Pour into prepared pans.
BAKE 30 min. or until toothpick inserted in centers comes out clean. Immediately run small spatula around cakes in pans. Cool cakes in pans 15 min.; remove from pans to wire racks. Cool completely. Spread Coconut-Pecan Filling and Frosting between cake layers and onto top of cake.

Saturday, April 24, 2010

Coconut Banana Bread with Lime Glaze

Paul's co-worker directed him to the BEST gluten free recipe for banana bread. It was perfectly dense, moist and delicious.

I was directed to a divine sounding* recipe for coconut banana bread with lime glaze.
*sounding - because I will never actually make the recipe to know if it tastes as good as it sounds.

And so I used both to make our own Gluten Free Coconut Banana Bread with Lime Glaze recipe. And our version makes two loaves!

Yes, there was only half of one loaf left to take a picture of.

We really did consume it that quickly.


Gluten Free Coconut Banana Bread with Lime Glaze
adapted from Gluten Free Mommy and Our Best Bites

Ingredients
1/4 C Quick-Cooking Oats (I just ground some old fashioned oats a little)
1/4 C Almond Flour (I used the pulp left over from making almond milk, dried it and ground it down to powder)
1/2 C Sweet Rice Flour (aka glutinous rice flour - which contains no gluten)
1 C Tapioca Flour/Starch
1 C Rice Flour
2 Tbs Flax Meal
3/4 C Brown Sugar
3/4 C Sugar
1 1/2 tsp Xanthum Gum
1 1/2 tsp Baking Soda
1 tsp Salt

6 Tbs Butter, melted and slightly cooled (to avoid cooking the eggs)
2 Eggs, whisked
1/2 C Yogurt, Plain or Lime flavoured
1/4 C Milk or Lime Juice
1 1/2 tsp Vanilla
3-4 Bananas, mashed

3/4 C Shredded Coconut

Topping
4 Tbs Shredded Coconut

Glaze
3/4 C Powdered Sugar
2 1/2 Tbs Lime Juice

Directions

Preheat oven to 350 degrees.

Mix together dry ingredients. In a separate bowl, mix together wet ingredients. Add wet mixture to dry mixture until just combined. Stir in the 3/4 c coconut.

Pour into two (2) greased/sprayed 9 x 5 loaf pans. Sprinkle each with 2 Tbs of coconut for topping. Bake for 55-60 minutes, covering after 40 minutes when the coconut topping is toasty. Cool the bread for 10 minutes in the pan than remove.

Whisk together powdered sugar and lime juice and drizzle/pour over both loaves. Cool another 15 minutes. Slice and devour!

Tuesday, February 16, 2010

Girl Scout Cookies

We all know now is the season of Girl Scout Cookies, whether you are one of the poor saps that only gets to order your cookies or the lucky duck that gets to open the boxes immediately. I have always loved these cookies. I am the lucky duck that has boxes of Thin Mints, Samoas, Tagalongs, and even the new Thank U Berry Munch cookies in her pantry already. Confession, some boxes are no longer there. Want to know why I am even more of a lucky duck than you? No one else in my family can eat them, therefore these cookies are ALL MINE!


But one does feel a little sad for the young members of my family that will never be able to try Girl Scout cookies. And imagine the agony Paul must feel having tasted the deliciousness of Girl Scout cookies, but no longer being able to eat them.

Never fear. I was directed to a website with recipes to make your own Girl Scout cookies! We decided to make them gluten free.

First up, Thin Mints (adapted for Gluten Free).

Chocolate Mint Cookie
  • Whisk together in a small bowl
    2/3 Cup + 1 Tbs Rice Flour
    2/3 Cup + 1 Tbs Tapioca Starch
    2/3 Cup + 1 Tbs Corn Starch
    1 Tbs Potato Flour
    1 tsp Xanthum Gum
    1/4 Cup Corn Starch
    6 Tbs Cocoa Powder
    1/2 tsp Salt


  • Cream together in mixer
    1 Cup Sugar
    1/2 Cup Butter, room temperature

  • With the mixer on low, add in the wet ingredients. Mixture will look curdled.
    1/3 Cup Milk
    1/2 tsp Vanilla
    3/4 tsp Peppermint Extract


  • Gradually, add in the dry mixture until fully incorporated.
  • Shape dough into two logs, about 1 1/2 inches in diameter, wrap in plastic wrap and freeze for at least 1-2 hours, until dough is very firm.
  • Preheat oven to 375F.
  • Slice dough into rounds not more than 1/4 inch thick - if they are too thick, they will not be as crisp - and place on a lined baking sheet. You can put them close together.
  • Bake for 13-15 minutes, until cookies are firm at the edges.
  • Cool completely on a wire rack before dipping in chocolate.

Chocolate Coating
10-oz Semisweet Chocolate
1/2 Cup Butter
  • Melt chocolate and butter in the microwave, stirring every 20-30 seconds, until chocolate is smooth.
  • Dip each cookie in melted chocolate, turning to coat, and place on wax paper. Reheat chocolate as needed to keep it smooth and easy to dip into.

  • Wait. You want the chocolate to be cooled and firm.
  • Eat one.
  • Place the rest in the freezer.
  • Try not to eat them all in one night.
Paul tried to recreate his favourite Girl Scout Cookie in gluten free form as well. Samoas, in bar form. Sadly, his did not work out as well. The shortbread base fell apart. I should say it became a powder with some crumbly chunks. It was also rather tasteless. We did not take pictures.

I did a little internet browsing for gluten free shortbread. On the Joy of Baking site I found this.
Rice flour is used in recipes to give the shortbread a more crumbly and tender texture.
Cornstarch is also used in shortbread recipes to produce a more delicate and fragile cookie.
Since those are two of the gluten free substitutes used, it's no wonder that his cookie base was "more crumbly," "delicate and fragile."

On the other hand, based on a lot of different sites and blogs, I did find what seems to be the accepted GF Shortbread Cookie recipe. But, I don't know if Paul is up for another attempt.

Friday, June 05, 2009

Brownie Lady Brownies (good enough to eat in church!)

These are the BEST brownies in the world. At least I think so. Stacy found the recipe on an online discussion board. The story goes that a lady walked into church with a 9x13 pan of brownies and a knife. She sat down in the pew, cut the brownies, and proceeded to consume the entire tray by herself. Everybody watched this woman hoover the brownies but nobody was brave enough to ask her about the incident.

Sometime after the second time this happened with the same woman in the same chapel, one soul was brave enough to approach the Brownie Lady as she became known behind her back. Turns out that the Brownie Lady was a pregnant lady and was succumbing to cravings. Now these are the kind of cravings I can get behind! Obviously a recipe for brownies that cause cravings so severe as to break a pile of rules of etiquette needs to be shared. So the Brownie Lady shared her recipe and it has been passed around along with the legend until it arrived at our appreciative home.

After hearing the story I immediately decided that I wanted to eat those brownies but I also dismissed the idea just as quickly because brownies have wheat flour in them. And gluten free brownies usually taste terrible.

Until now. Since this brownie recipe only contained 1 1/2 cup of flour, Stacy decided to substitute with our mix of gluten free flours. I almost literally held my breath while this thing baked. And the fudgey yumminess that came out of that warm little box became my favorite brownie of all time. Even better than the good stuff I had eaten before the family went gluten-free.

Here's the recipe in all of it's glory:

Brownie Lady Brownies
(good enough to eat in church)

2/3 C Cocoa
2/3 C Shortening, Melted (Not butter flavored)
4 Eggs
2 C Sugar
1 tsp Vanilla
1 1/2 C Flour (Gluten free mix below)
1 tsp Baking Powder
1 tsp Salt
1 1/2 C Miniature Marshmallows
1 C Chopped Nuts (we substitute chocolate chips here)

Mix cocoa and melted shortening in bowl. In seperate bowl beat eggs, sugar and vanilla. Add to cocoa mix. Add dry ingredients EXCLUDING marshmallows to cocoa mixture. Mix well. Stir in marshmallows. Pour into 9x13 pan and bake @ 350 for 25-35 minutes. Your fork or toothpick won't come out super clean because of the marshmallows.

Gluten Free Flour Substitution
1 1/2 C Flour =
1/2 C Rice flour
1/2 C Tapioca starch
1/2 C Corn starch
1 1/2 tsp potato flour (not starch)
3/4 tsp Xanthan gum

OK, so that' s a little more than 1 1/2 cups, but it works.


Once you have this recipe perfected, you can start to improvise. As good as the brownie is, I like to use it as a platform for flavor. These are great with ice cream, fudge, and caramel. I have made two 9" rounds and sandwiched a peanut butter and chocolate filling between them making an incredibly huge Reese's Peanut Butter Cup concoction that is still referred to at work.

Oh the things you can do!